Make your own Halloween Mickey headband! Here’s how to do it if you want to complete your Halloween costume at home, with a touch of Disney!
Mickey’s head pumpkins are some of the most adorable Halloween decorations at Disneyland. You may have noticed that they come in a variety of shapes, from simple pumpkins to swirly-eared designs to smiling Mickey heads.

So I couldn’t resist making a great accessory for Halloween!
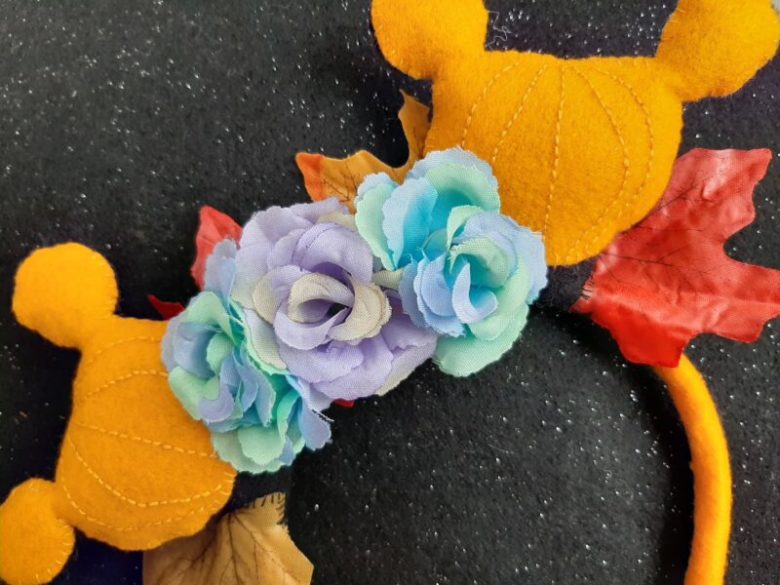
I added fall leaves inspired by the garlands at Main Street USA and Frontierland. And even though Mickey’s Halloween Celebration parade didn’t make it to the park this year, his spirit is celebrated in this headband! The green and purple flowers match Mickey’s costume and the Haunted Mansion float.
Customise your own headband based on your favourite Disney Halloween moments!
Material :

- A flat headband
- Orange felt fabric
- Black felt fabric
- Stuffing for stuffed animals
- Needle and thread, or strong glue for fabrics
- Cardboard
- Pattern for the large circles (e.g. small pot)
- Pattern for small circles (e.g. eraser)
- A pen
- Pencil
- Scissors
Optional :
- Embroidery thread
- Felt for textiles
- Fabric flowers
- Autumn leaves in fabric
- Spider webs, plastic spiders, all the little Halloween accessories you want!
Step 1: Cover the headband
If you are using a padded fabric headband, you can skip this step.
Cut a wide strip of felt that can cover the entire length of your headband. Keep it carefully aside as you will need it later!
Some felt sheets are too short to cover the entire headband. No problem! Just cut a strip to cover the centre, and add a black or orange strip to cover each end (basically, make it something pretty).
Step 2 : create the Mickey head pumpkin pattern
Draw the outline of the large circle. Then gently move the pot 1 cm to the side and draw the outline again. The overlapping circles will form the pumpkin.
Then place the smaller circles on each side to make the ears. If you wish, you can draw the outline with a black marker to better distinguish the cutting lines.
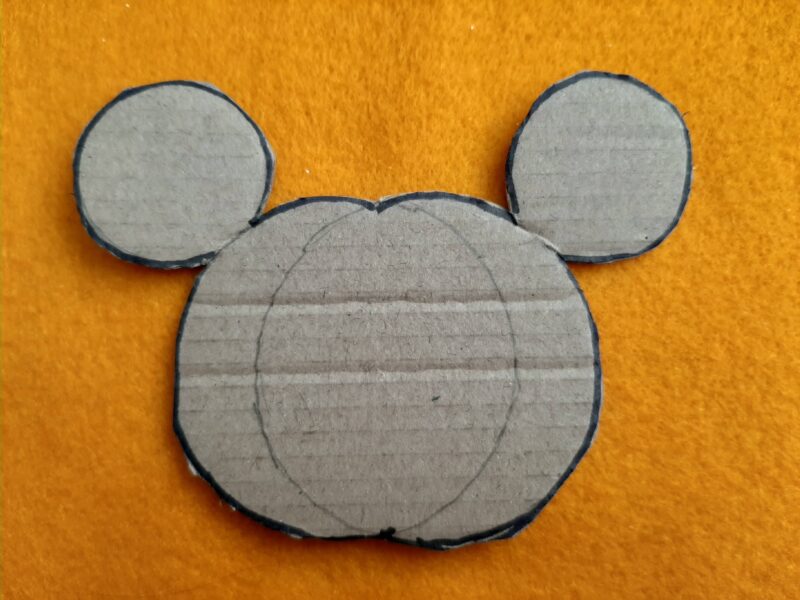
Then cut off Mickey’s head!
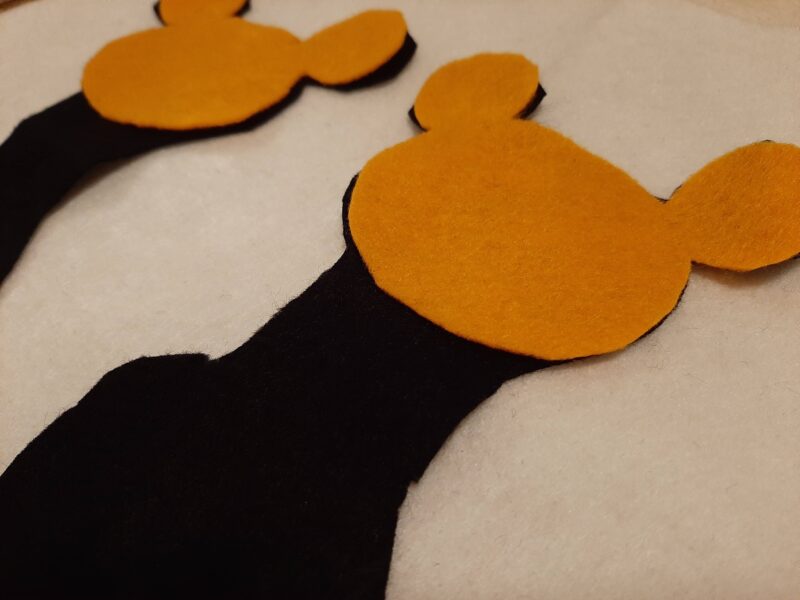
Step 3 : cut the fabric
Cut out 2 orange pumpkins using the pattern you have created.
Then fold the black felt in half to make the back of the pumpkins. Now you will need enough fabric to go around your headband.
Fold the black fabric in half and place the edge of the headband along the fold line, or measure around your headband. This will ensure that you can fold the cuff around the headband, so that the Mickey’s heads fit snugly on top.
Then place the pumpkins on the black fabric and cut out the outline in both layers.
Cut straight out from the fold and around the pumpkins. Do the same for the second pumpkin.
It should look like this…
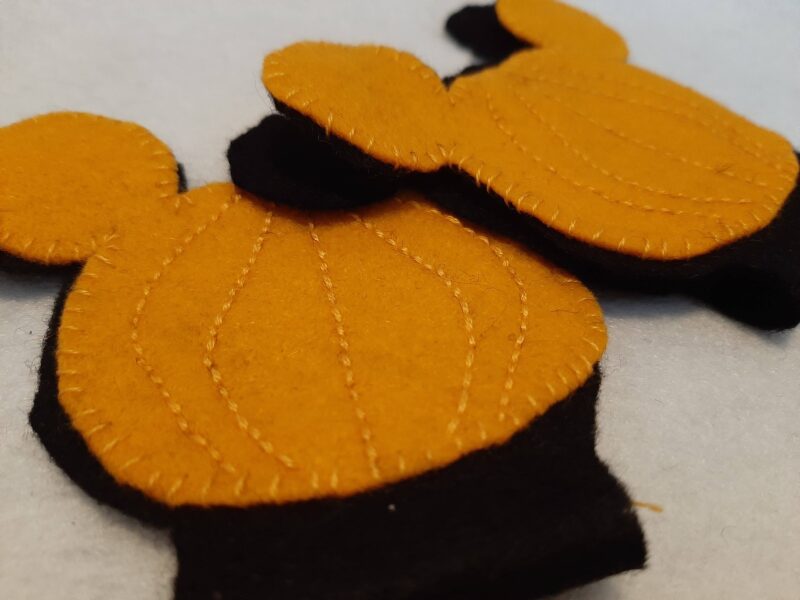
Step 4 :Decorate your pumpkins with Mickey’s head!
The best part: let your personality speak for itself!
Start by sewing or gluing the orange Mickey pumpkins to one side of the black fabric. Then sew the lines to create the pumpkin shape. I used two embroidery threads for the back seams.
You can add twists to the ears, a Mickey head or anything else you like! If you are not very good at sewing, you can create the illusion with a textile marker and create the design you want.
Step 5 : sew and stuff
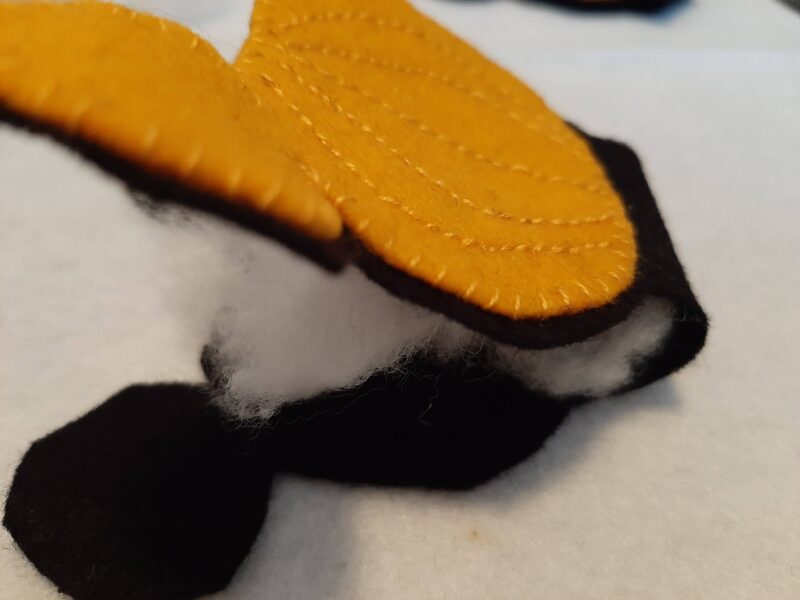
Fold the sides together. Start at the bottom corner of the orange pumpkin, sew along the edge and around the first ear. Push stuffing into the ear.
Sew the top of the pumpkin and the outline of the second ear, and add padding in the second ear.
Sew the bottom corner of this side, making sure to leave a space for the headband to go through. Then add padding to the large part of the pumpkin. It should have enough padding to hold its shape.
Repeat for the second pumpkin.
Step 6 : cover the headband and add the pumpkins
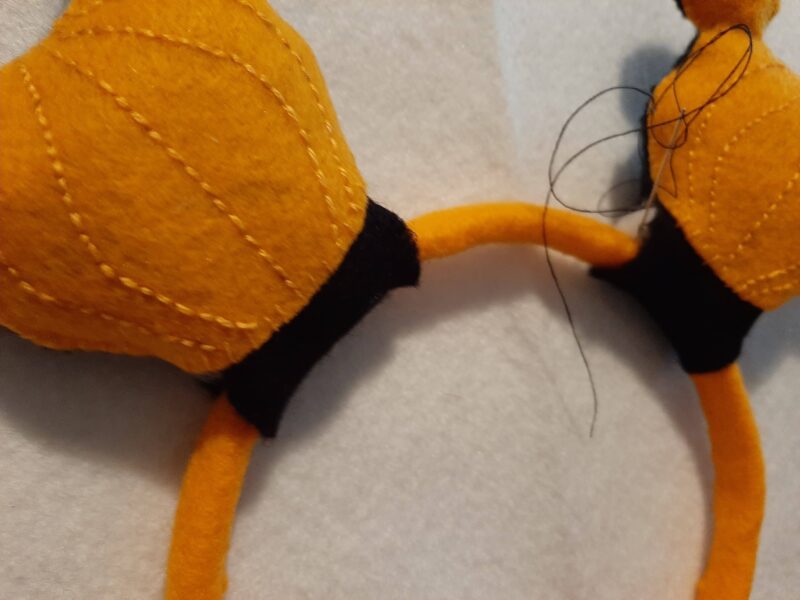
Sew or glue the fabric tightly around the headband (I lined the seam with a border so it wouldn’t be too visible, and so it would be comfortable).
Now slide the pumpkins onto the covered headband and place them in the desired position.
Carefully sew (or glue) the pumpkins to the fabric. I used a strong sewing thread for this step.
Step 7 : decoration !
Add any decorations you like at this stage, but if you want it to look like mine, this is what I did.
Sew a fabric leaf to the outer edge of each pumpkin. Then sew the three flowers to the centre of the headband. Then add a leaf to the inside seam of the pumpkins, overlapping them to hide the back of the flowers.
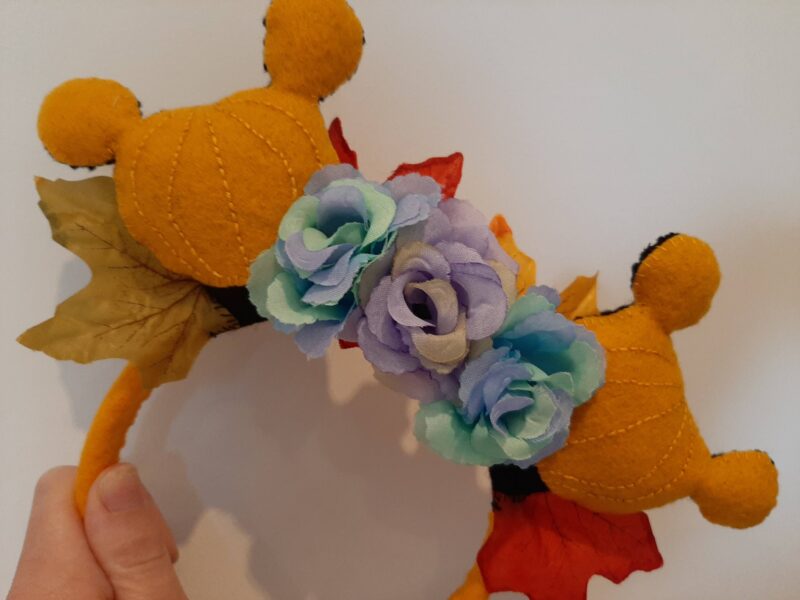
And that’s it! Your pumpkin headband with Mickey head is ready… Happy Halloween!