
A t-shirt decorating craft project inspired by Hocus Pocus and Hocus Pocus 2! Find out how you can transform an old, plain t-shirt into a Halloween favourite.
Since it requires cutting with a sharp blade, ironing and using permanent fabric paint, this Sanderson Sisters inspired craft project is only for adults.
Materials:
Plain t-shirt
Fabric paints in at least 2 colours (example shows gold and silver)
Paintbrush
Cardboard from a parcel or cereal box
An iron and ironing board
Pencil
Ruler
Scissors
Lino sheet
Lino cutting mat and tool
Or your choice of printing method.
This version is made with lino printing, but you can easily swap to another printing method of your choice. Even potato printing can work – but please test the effects first on a scrap of paper or preferably a scrap of fabric.

Preparation
Before you begin, clear plenty of space on your table and cover it to prevent any accidental printing effects or stains. Wash, dry and iron your t-shirt to make sure it’s neat and even.
Work out a design in advance, or follow the example. You could include spell books, cauldrons, cats, brooms (or broomies!), candles, witch hats… anything witchy that is easy to cut out on a small scale!
Here, the spooky motifs all jump out from one corner – but you could cover a larger space, or even just add a Halloween cat to a pocket.
Step 1 – Draw your with witch starter kit!
Take your lino sheet (or preferred stamping surface) and measure out six boxes. Draw a witch-inspired image in each box, making sure that any details are chunky enough to print clearly.
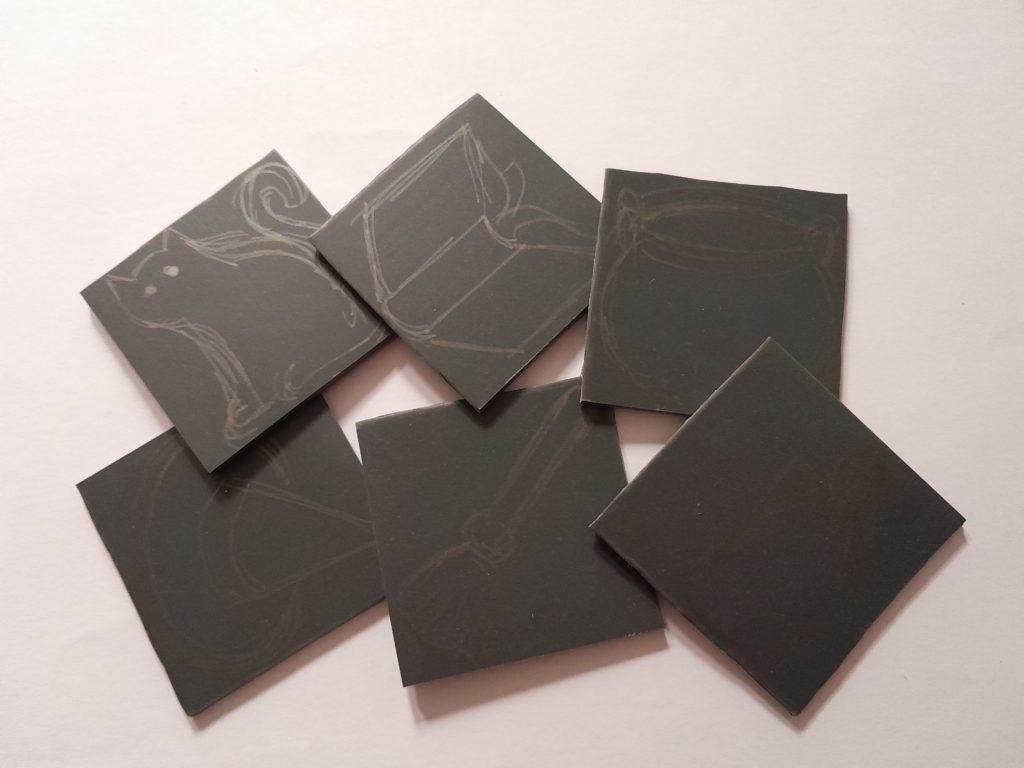
Step 2 – Cut out your stampers
Using your lino cutting tools, or alternative, cut out the witch motifs. Take care to follow the instructions for your printing equipment, since they can be sharp.

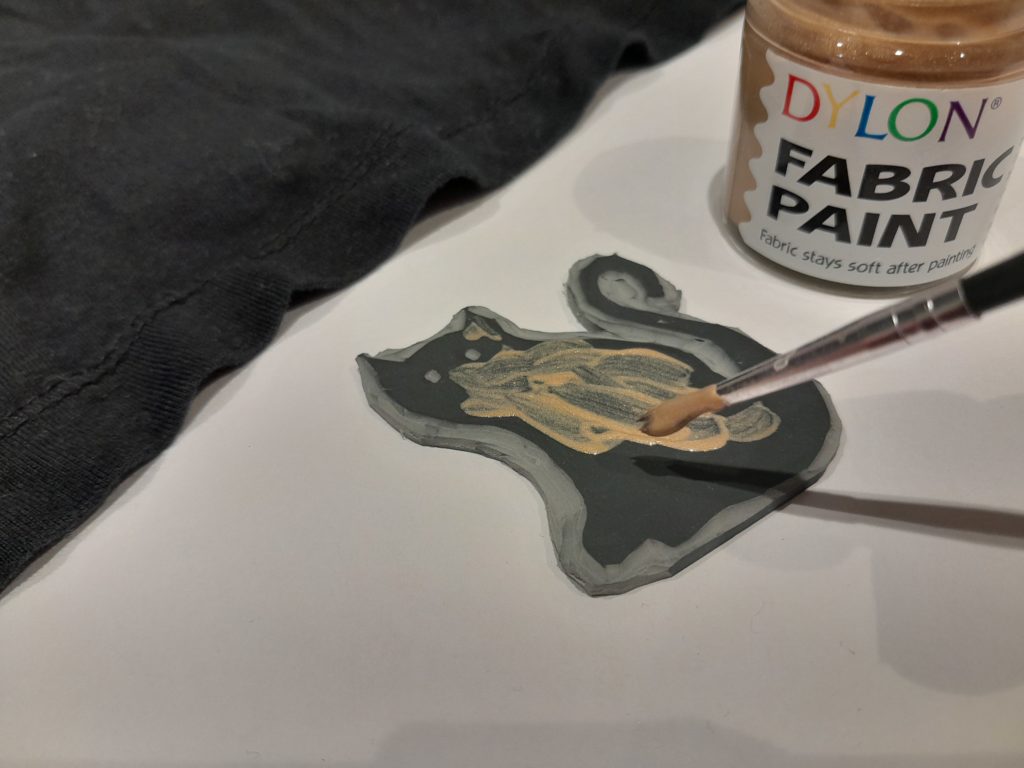
Step 3 – Start adding fabric paint
Place a sheet of cardboard between the layers of the t-shirt so that the fabric paint doesn’t travel through. Then use a brush to apply the fabric paint to your first stamper. Make sure the paint is evenly applied, and that it’s a thick enough layer.
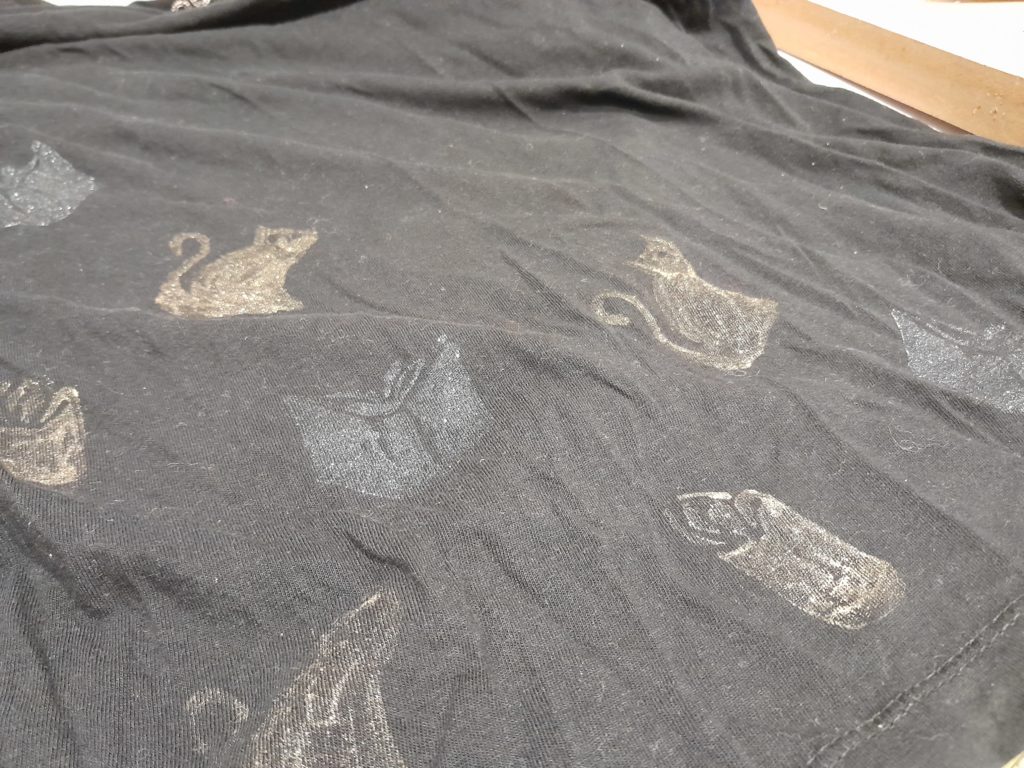
Step 4 – Print your pattern!
Apply your stamper to the fabric of your t-shirt, following your preferred pattern. Repeat as needed, adding a fresh layer of paint for each print, to make sure it shows up clearly. Continue printing, alternating between your chosen colours.
Step 5 – Let the paint set
Leave your project to dry, then follow the instructions on your fabric paints to make the design permanent. And of course, be safety conscious if you need to iron your design to set it.
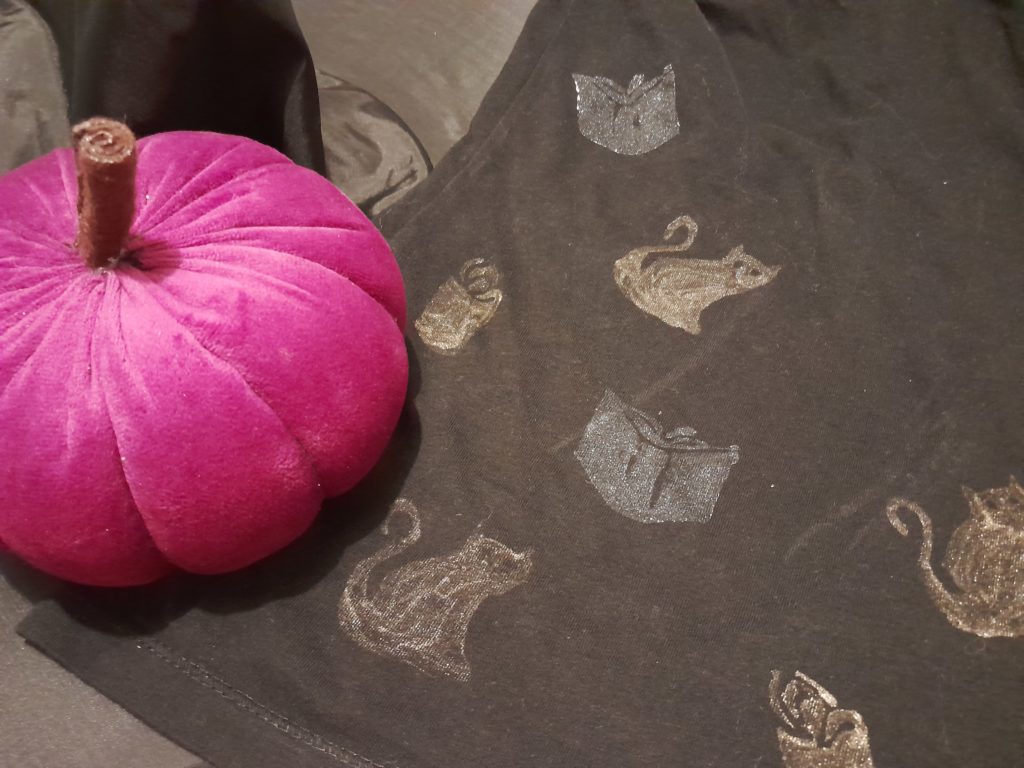
Wear your new Halloween t-shirt!
That’s all you need to know – your new Hocus Pocus inspired t-shirt is ready to wear. Have a happy Halloween!