
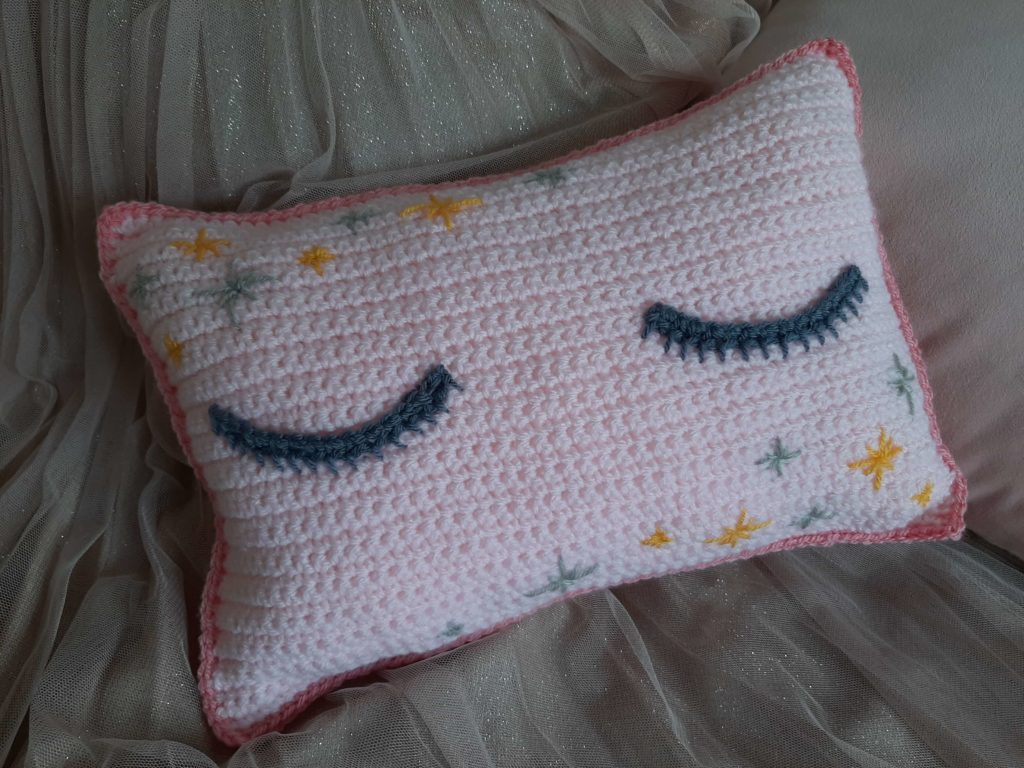
Enchanted Sleep Cushion: a free crochet pattern for Sleeping Beauty fans! Inspired by the traditional fairy tale, this easy craft project shows you how to make a decorative cushion that will give your room a little bit of sparkle.
In the classic story, the princess falls into an enchanted sleep. So I’m going to show you an easy way to make a crochet eyelash pillow with a magical twist – in rose colours, for Briar Rose.
This easy Sleeping Beauty crochet project is made with simple crochet stitches and little bit of embroidery – so it’s easy to customise! Follow the basic instructions and feel free to add your own enchanting details.
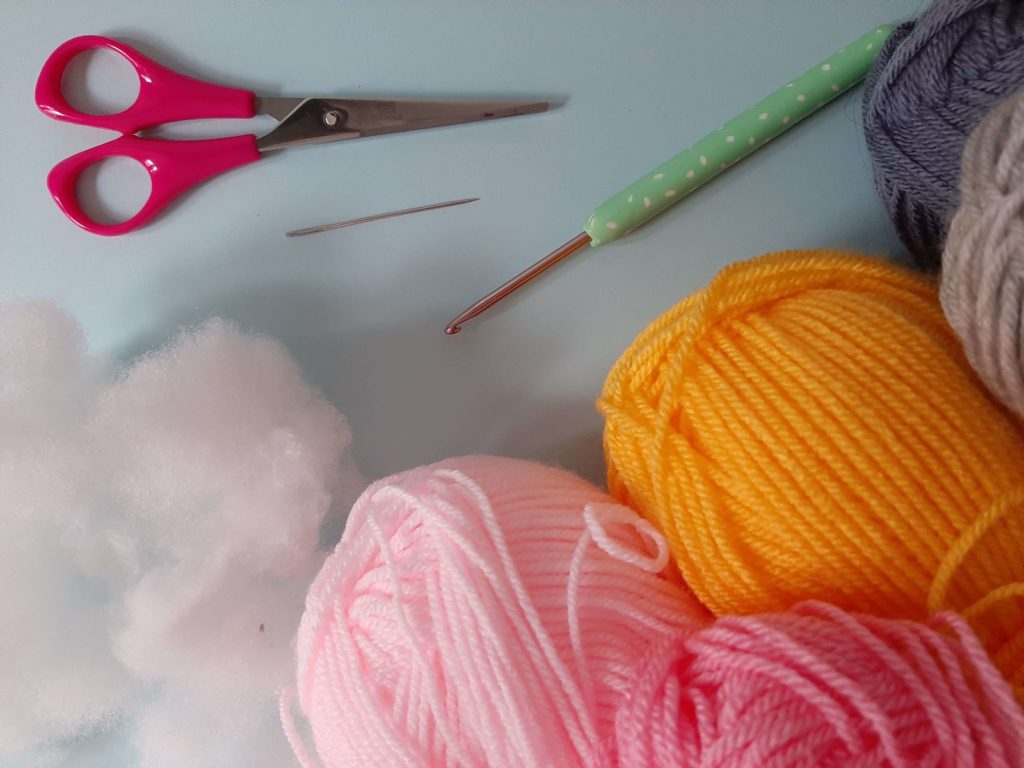
MATERIALS:
- 1 ball of DK (double knit) yarn:
- Pale pink
- Candy pink
- Small amount of yarn:
- Charcoal grey
- Light grey
- Golden yellow
- 3.5mm crochet hook (or the preferred size for your yarn)
- Tapestry needle
- Scissors
- Toy filling
- Optional:
- Place markers or safety pins
ABBREVIATIONS:
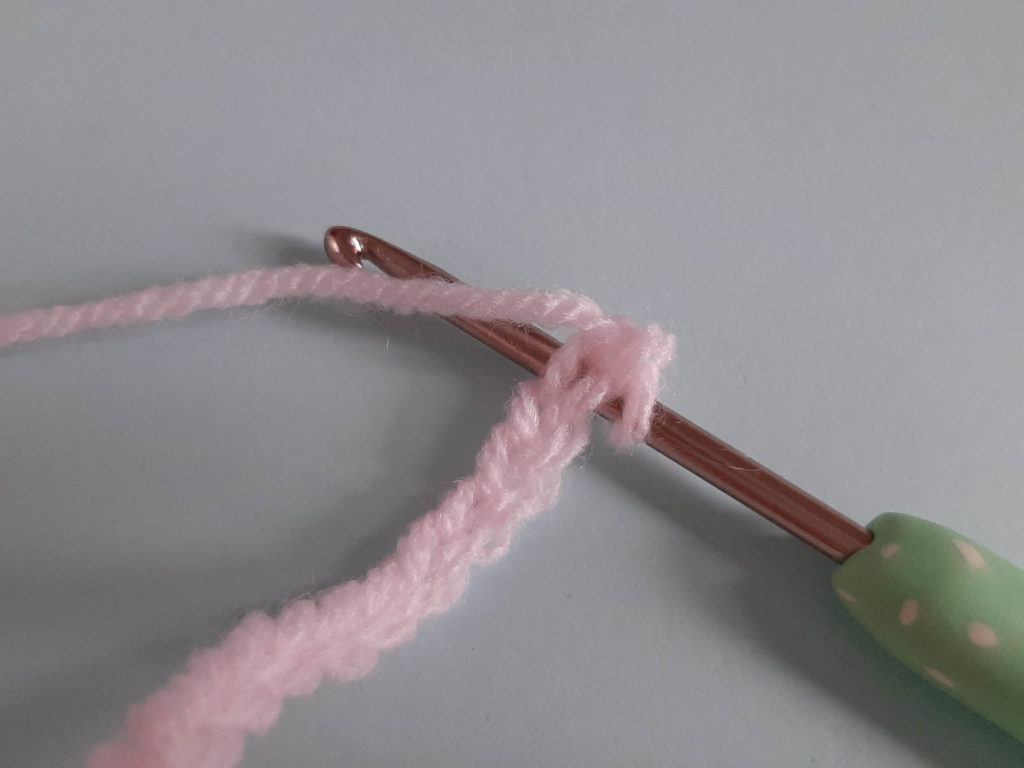
Chain – ch
Bring the yarn over your hook and pull through, repeat to the chain number you need. Unless otherwise stated, the turning chain doesn’t count as a stitch.
Double crochet (UK) – dc
Pass the hook through the v-shaped loop formed by the stitch on the previous row. Bring the yarn over your hook and pull it through. Then bring the yarn over the hook again and pull it through the 2 loops on the hook.
Slip stitch – sl st
Pass the hook through the stitch, bring the yarn over your hook. Pull it through the stitch and the loop on the hook at the same time.
Stitch – st
METHOD:
Here’s how to make your cushion, then decorate it…
Cushion Panels
Using 3.5mm hook and pale pink yarn, 71 ch.
Row 1: Starting with the 2nd ch from the hook, work 1 dc into each ch until you reach the end of the row. Turn. (70 sts)
Row 2: Ch. Starting in the first st, dc to end.
Repeat row 2 until your cushion measures 20cm in height.
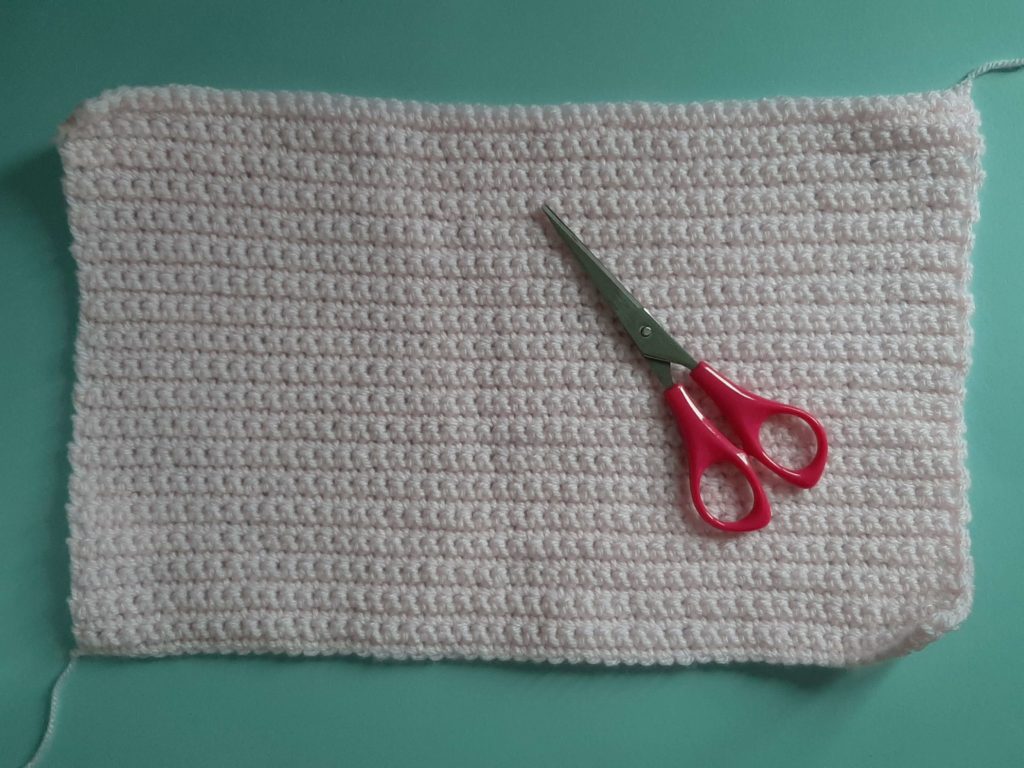
Fasten off your yarn, and use your needle to weave in the ends.
Repeat to make the reverse panel of the cushion.
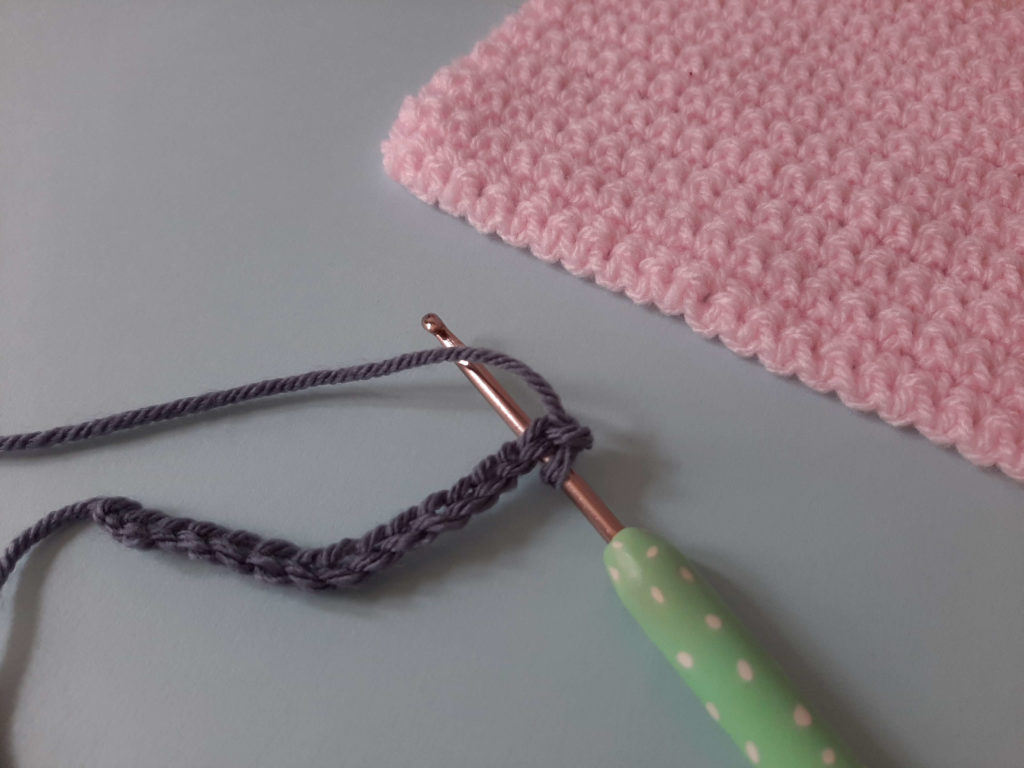
Eyelashes
With charcoal yarn, 15 ch. Fasten off, leaving a long tail. You’ll use this to stitch it onto the cushion.
Repeat to make your second eyelash.
Select one of your panels and set it in front of you with the right side (RS) facing up (the corner where your yarn started for the chain, should be bottom left).
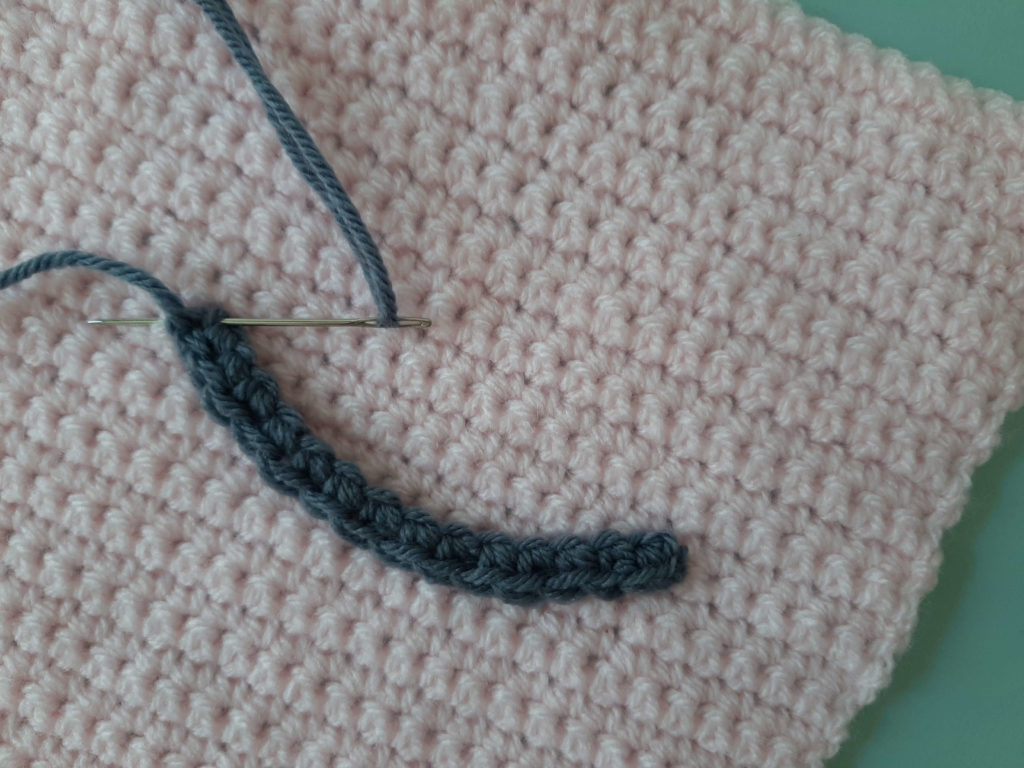
Position the lashes according to the photo, or as you prefer. The eyelashes on my cushion are positioned over the central row and two rows above, and start between the 5th and 6th st from the outer edges of the panel.
Using the charcoal yarn and tapestry needle, carefully stitch the eyelashes in place. If you prefer, you can mark the positioning and shaping onto your cushion in advance. They should form a curve – take care to avoid sharp angles and keep checking the effect as you work.
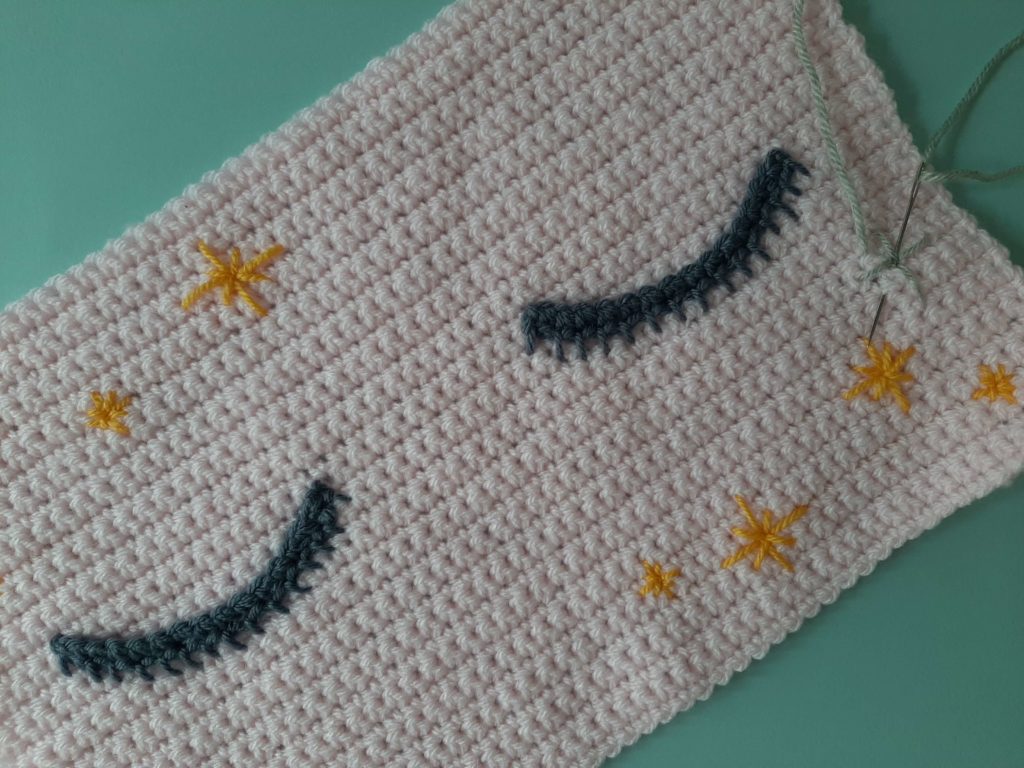
Once they’re secured, you can add individual eyelashes. You can personalise this to your favourite lash style, add an eyeshadow or an eyeliner effect.
I’ve chosen simple lashes covering one stitch, bringing the needle up at the furthest point of each lash and ending at the crocheted lash line. The example shows one lash per dc on the crocheted eyelash line.
Repeat for the second eyelash.
The second lash can be harder, because you’re aiming to match the first one. Don’t be afraid to take more time on it if you need to – it’s worth it to get the finishing touches right.
Magical Stars
Now add a sprinkle of magic!
Working with golden yellow and your tapestry needle, stitch 4 longer lines to form a cross. Then create 4 shorter diagonal lines in between, to form the star.
Repeat in larger and smaller sizes to give a sparkling effect. On my cushion, I’ve added 4 stars near the top left corner, and 4 near the lower right.
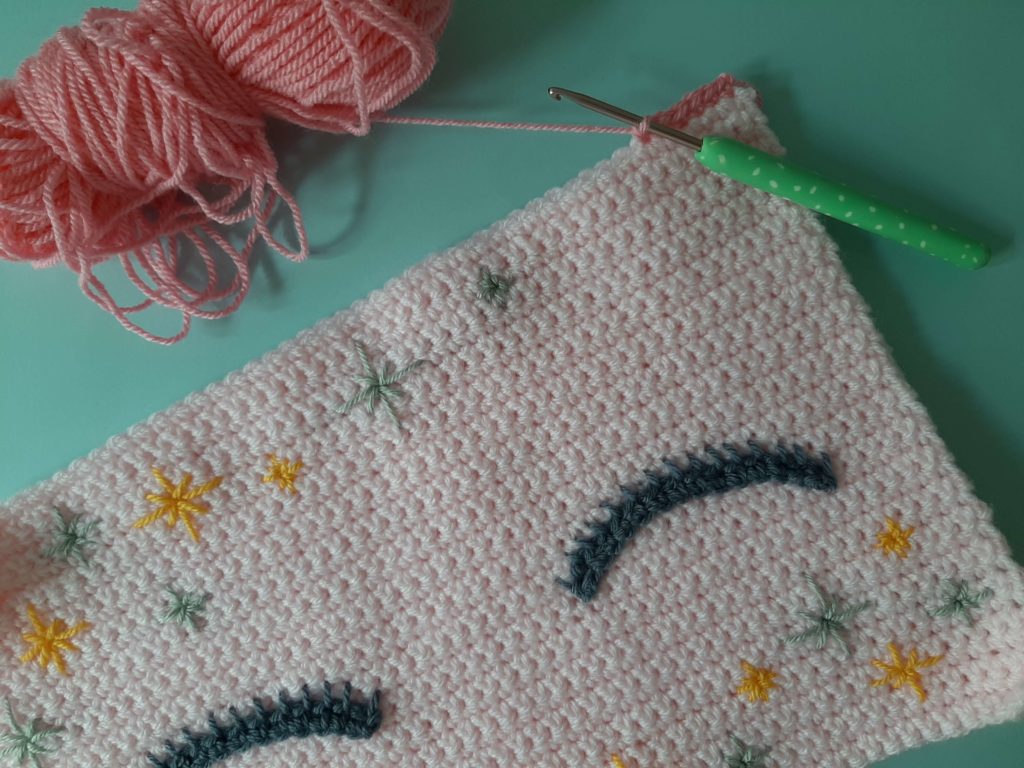
Working with light grey and your tapestry needle, repeat the process. In the example, these paler stars lead further towards the centre of the cushion – they don’t stand out as boldly, so it creates a softer finish.
But you can personalise the effect any way you like!
Make Up Your Decorative Cushion
Once the details are complete, place both panels together with RS (right sides) facing outwards and line up the rows.
If you prefer, pin or use stitch markers to keep them neat.
Join with candy pink yarn on the lower edge.
Working through both layers, dc to end, working 3 dc into the corner st.
Repeat twice.
On the final edge, pause leaving a 5-10 cm gap, and add the toy filling. It should be plump enough that it bounces back when you lean on it. But avoid over-filling the cushion, or the fibres will start showing through.

Complete the edge in dc, joining with a sl st.
Fasten off candy pink yarn and weave in the ends.
Your Enchanted Sleep Cushion home decoration is complete!