I dreamed it and I did it!
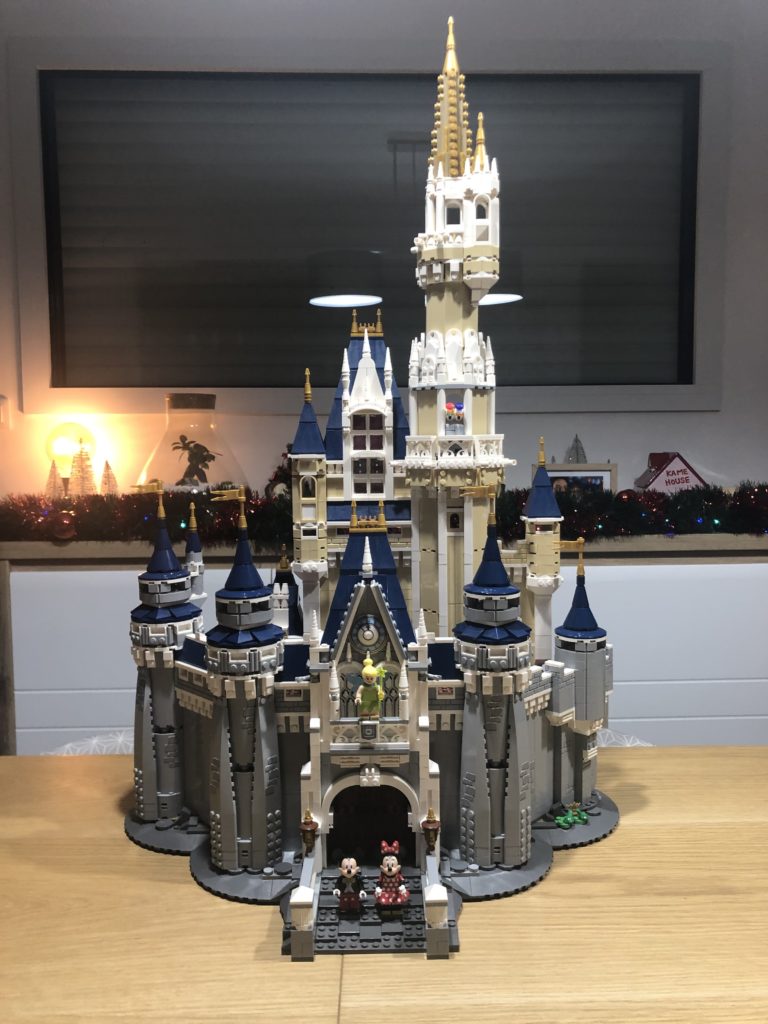
On 30 October 2020, I acquired the LEGO® Disney Castle Disney™. It didn’t take me long to get into this beautiful, and educational, build.
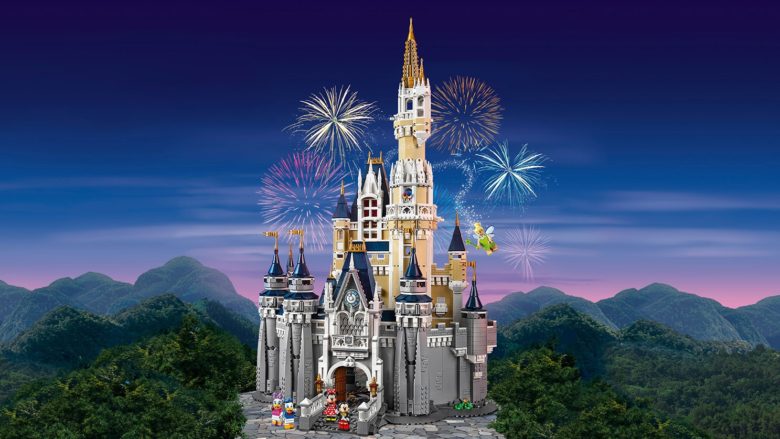
The Disney Castle – LEGO® Disney™
- Released: 2016
- Reference: 71040
- Franchise: LEGO® Disney™
- Representing: Cinderella Castle of the Magic Kingdom at Walt Disney World (Florida – U.S.A.)
- Number of Pieces: 4080
- Height: 74 cm
- Width: 48 cm
- Depth: 32 cm
- Number of Stages: 4 and a central tower in 5 stages
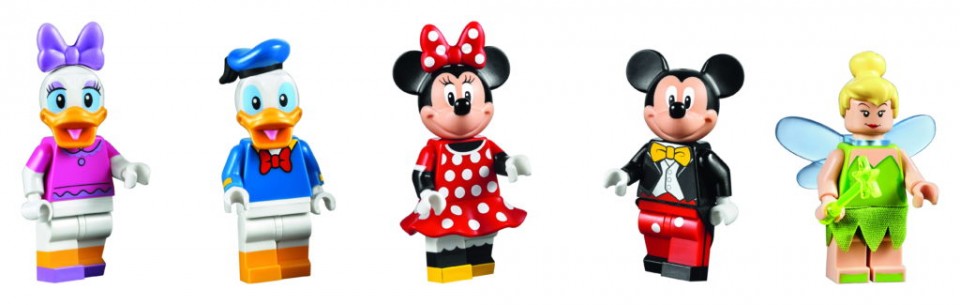
- Characters included: Mickey, Minnie, Donald, Daisy, Tinker Bell
- References from the films: Fantasia, Aladdin, Sleeping Beauty, Beauty and the Beast, Snow White, Cinderella, Rapunzel, The Princess and the Frog and Brave
- Minimum age requirement: 16 years and up
- Price: 349,99 € (£309.99)

“Once begun, is half done”
I hadn’t touched LEGO® since my childhood. But as a good Disney fan, I wanted to dive back into the bricks to build this beautiful castle.
You can find this set instore or online at LEGO®. It is of course available at LEGO® Store in Disney Village.
Just looking at the box (58 x 47.5 x 16.5 cm), I had stars in my eyes…
But when I looked at the paving slab being used as an instruction manual (492 pages), I said to myself that I was taking on a major task! 4080 pieces, I was starting big…
There are 34 bags of bricks in all. Fortunately, it’s easy to find your way around, the bags are all numbered. Just don’t unwrap everything like a child opening their presents on Christmas Day! You have to go gradually, bag by bag and follow the instructions in the leaflet. Everything is well detailed, including the models and the number of bricks you will need at each stage of construction.
When you look at the final result, it looks like big pieces joined together. Pretty easy you say?
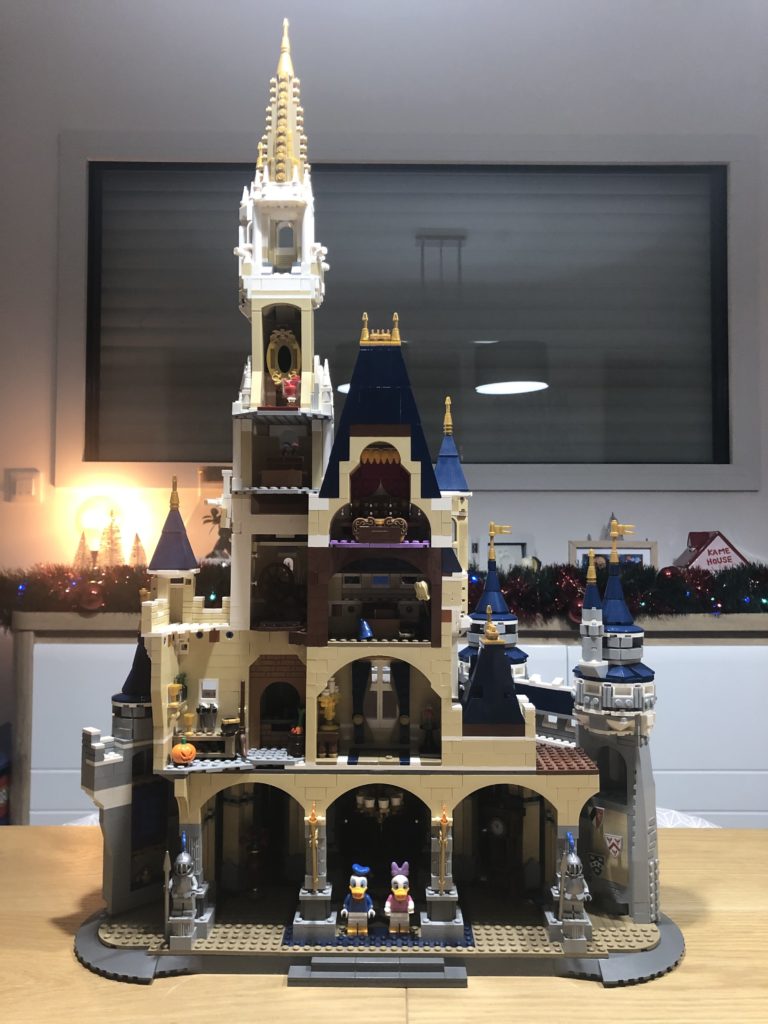
But it’s a little more complicated than it looks… It’s full of little pieces, which when assembled will form a block, assembled with other blocks, which form a part of the castle. And so on, to reach the end of the construction. The construction obviously includes the castle seen from the outside but also what it contains inside. From the back, it is a “slice” construction that will allow you to observe each room of the castle.
I started a stopwatch to see how long it would take me to put all the bricks together out of curiosity. I had seen that it took an average of 10 hours. It’s about 4:30pm, let’s goooo!
By 1.37am, I had only done the base…
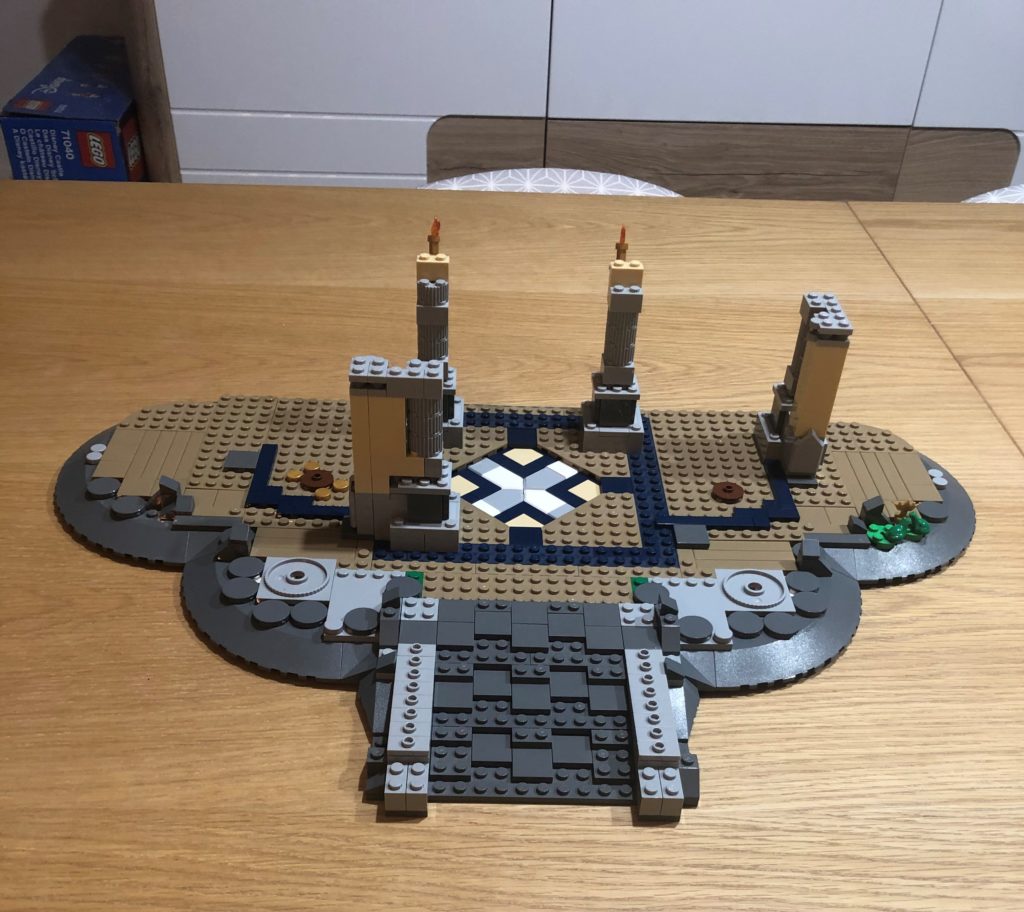
Again, it looks like a lot of pieces to put together but it’s not. I couldn’t believe how many pieces I used just to create this base. Indeed, there are the visible parts, but also the ones you don’t see, hidden under the base to strengthen it.
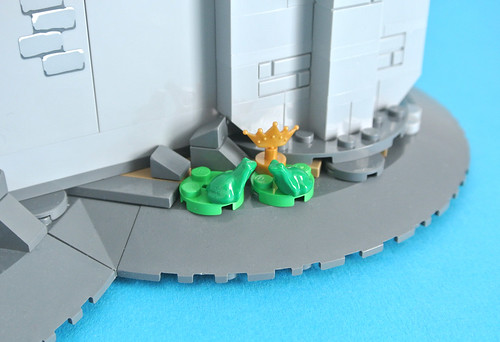
The first Disney reference appeared: the two frogs and a golden crown from The Princess and the Frog.
Brick by Brick
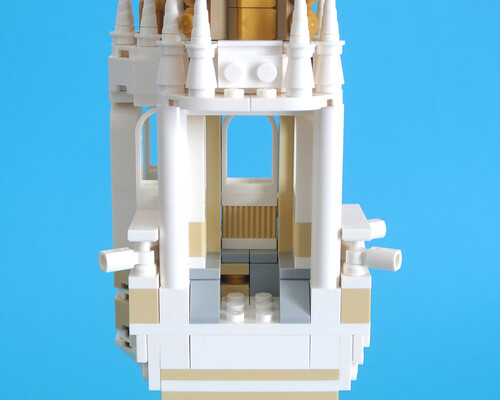
5 hours and 22 minutes later, I had finished the first floor and the second floor of the castle. The first floor of the main building of the castle includes:
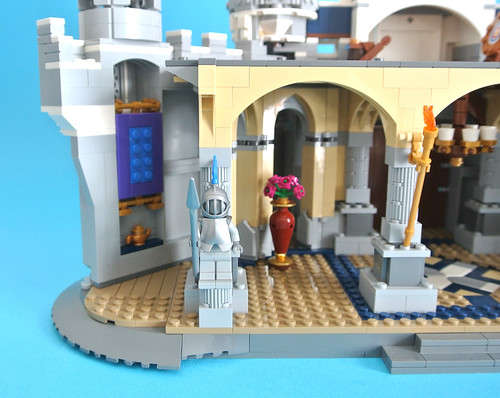
- a hall with a vaulted entrance;
- a sun in mosaic;
- a decorated chandelier (that can even turn);
- two suits of armour;
- a wall decorated with shields;
- a clock with a manually swinging pendulum;
- a vase with flowers to construct;
- a flying carpet;
- and a golden lamp in reference to the movie Aladdin.
The room on the second floor of the main building has dark blue curtains to build with a curtain pole, a rose under a bell jar and a large candlestick that rests on a console table to build as well. The rose and candlestick will immediately remind you of Beauty and the Beast.
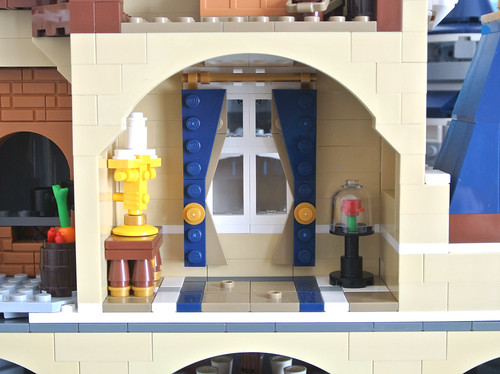
Outside the building, there is a walkway with a target, a bow and its quiver of arrows. It was probably Merida, the heroine of Brave who put them there.
While admiring my work taking shape, I told myself that there was still a long way to go. Despite a few breaks where I stopped the clock, I felt that my concentration was slipping and that I needed a good night’s sleep to be able to continue this beautiful project.
Second part, here we go again!
The next day, I was eager to have some time to myself, to get back to my bricks! I waited patiently in the evening before getting back to it. I started again around 6pm and restarted the timer where I left off.
After 7 hours and 32 minutes, I had finished the second and third levels.
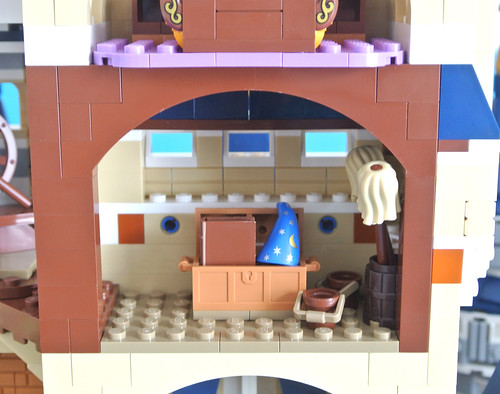
The second floor room of the castle includes a chest with a book of spells, two mops and two buckets referencing the movie Fantasia. There is also access to the second floor room in the main tower.
The room on the third floor of the main building is furnished with a decorated bed and its headboard.
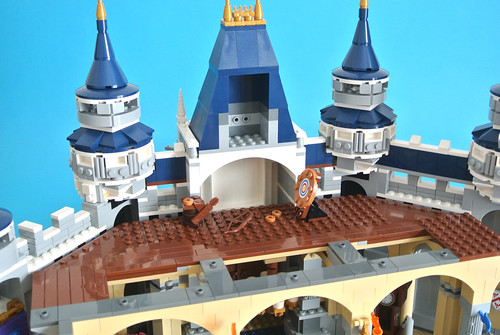
Most of the work was done, but I still had to build the last floor of the castle with the main tower. Already, I could see during the construction process, the incredible details and more references to the movies that are so dear to me.
Now it was time to tackle construction of the main tower.
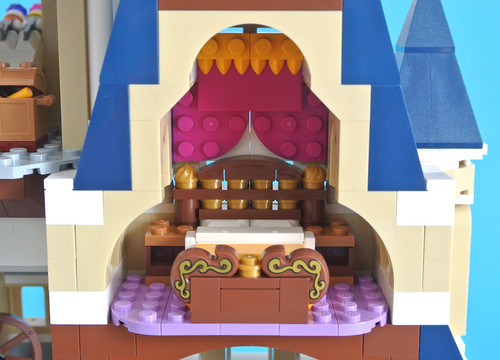
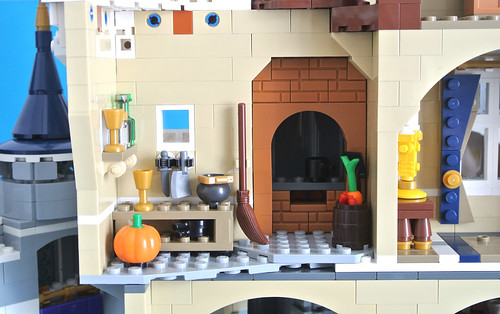
The kitchen on the first floor of the main tower includes a large brick stove, a work surface, a broom, a pumpkin to build, pots, pans, and kitchen and food items. The reference to Cinderella is plain to see from these details.
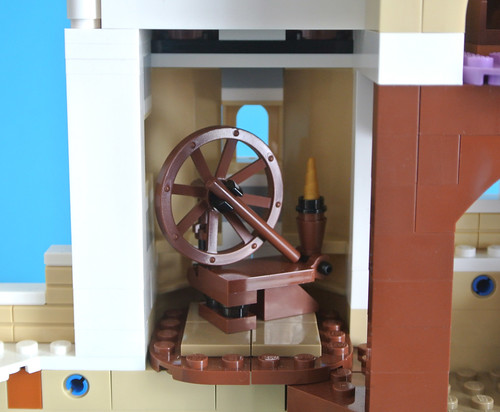
The room on the second floor of the main tower has a spinning wheel with a spindle reminiscent of Sleeping Beauty. There is also access to the room on the second floor of the main castle building.
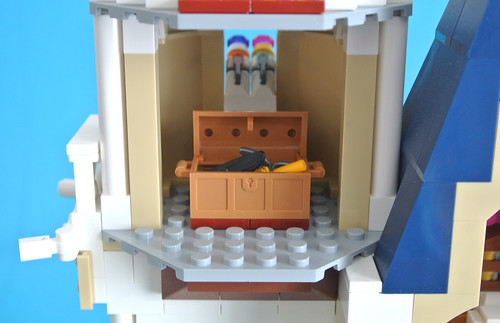
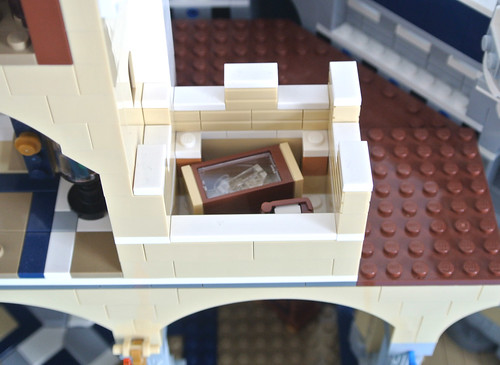
The room on the third floor contains a treasure chest with a pair of scissors, a brush and hair which evokes PrincessRapunzel’s. There are also two stud guns to build and two fireworks to project.

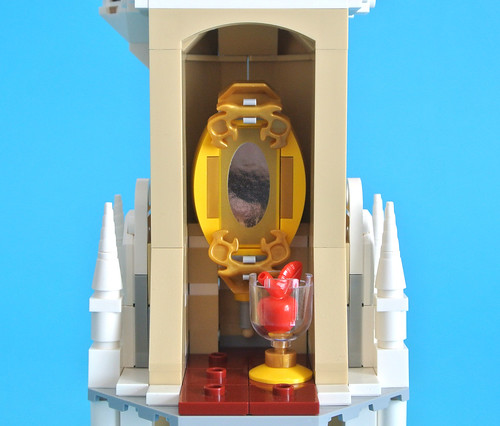
The room on the fourth floor of the main tower features a golden mirror, a red apple and a glass vase. Did you get it? That’s right, it’s Snow White for sure.
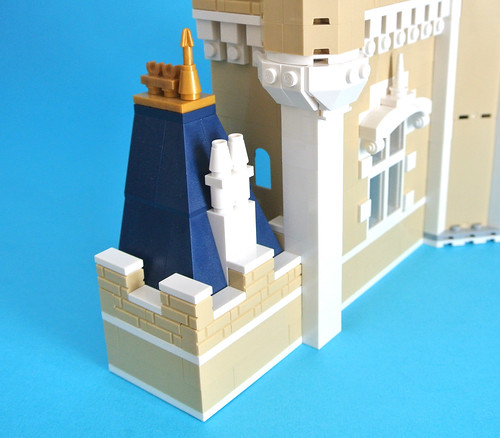
The room on the fifth floor of the tower is cramped. Because there are only railings near the windows for you to contemplate the breathtaking view.
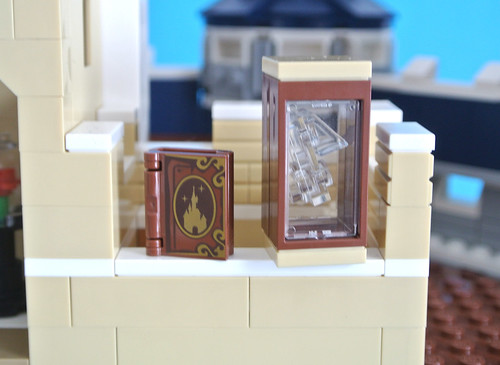
You can also remove part of the roof section of the main building to reveal the glass slipper and a book of fairy tales, once again in reference to Cinderella: after all, it’s her castle 🙂
Alongside the main build, there are also the characters of Mickey, Minnie, Daisy, Donald and Tinker Bell to construct.
It’s after 10 hours 55 minutes when I place my final brick. At last I’ve finished building the Disney Castle by LEGO®. It’s a little point of pride to have completed it because it’s truly a lovely piece! A little cumbersome but if you have the space to display it, I promise you it’ll impress your friends and family (Disney fans or no) 😉
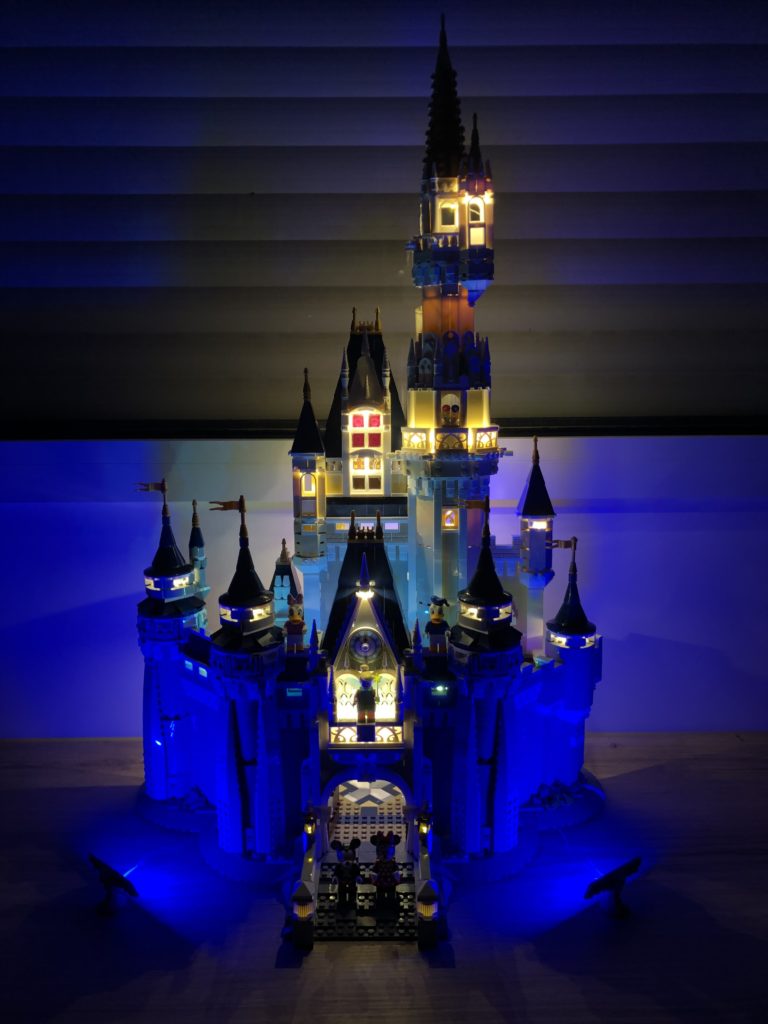
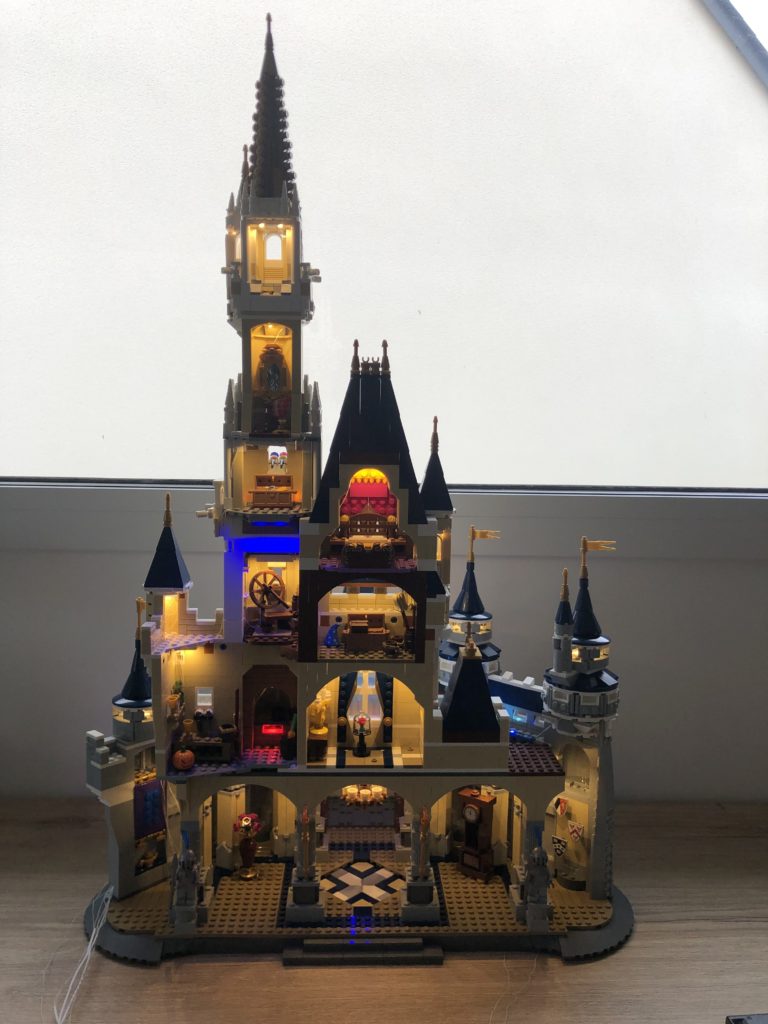
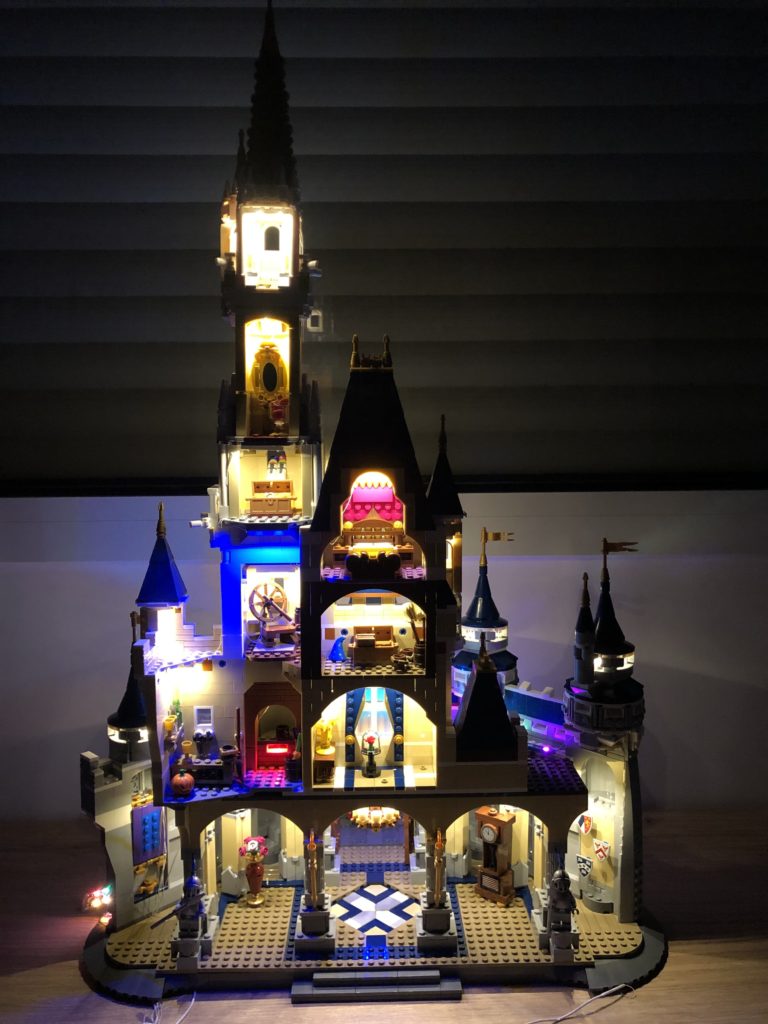
Let There Be Light!
I wanted to take it a step further by adding an LED lighting kit to illuminate my beautiful castle.
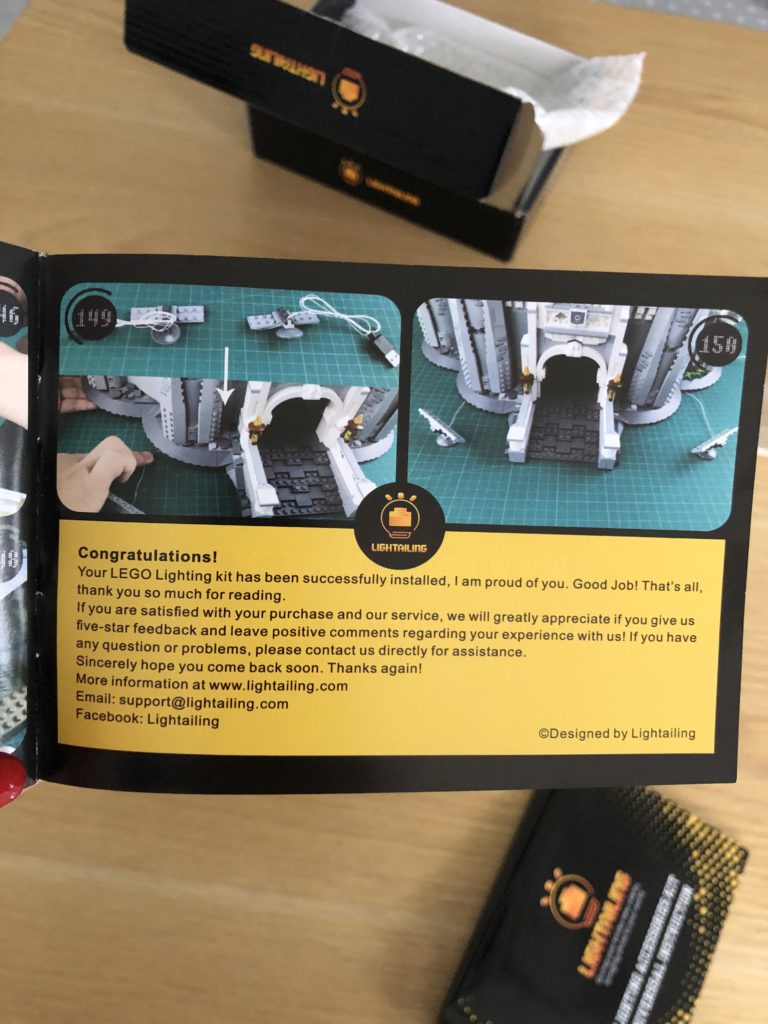
A number of sites offer to sell you lighting kits like Lightailing or Lightmybricks. For my part, I chose the kit by Lightailing for 100 €. The equivalent set by Lightmybricks was being sold for almost twice the price…
Don’t hezitate to consult the reviews. Because with some sites, all the kits are not of equal quality and certain kits may include accessories or not. For example: a remote to programme and control your lights.
The instructions are only provided in English, but they’re understandable for non-English speakers. It’s maybe a little less precise than the LEGO® one. Nevertheless, it’s well illustrated all the same with the stages set out step-by-step.
Before you start, check that your kit works. It would be a shame to install it and have to dismantle everything…
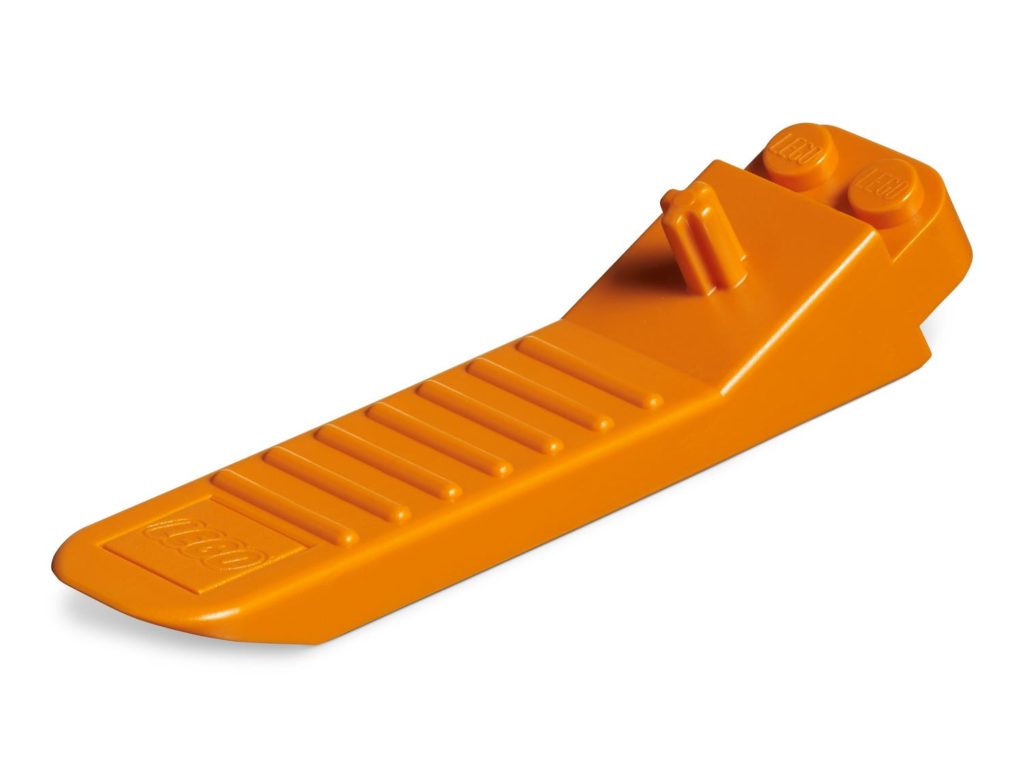
To assemble the kit, you need to be meticulous and have a lot of patience. The LEGO® brick separator (supplied in your original LEGO® box) will be a great help!
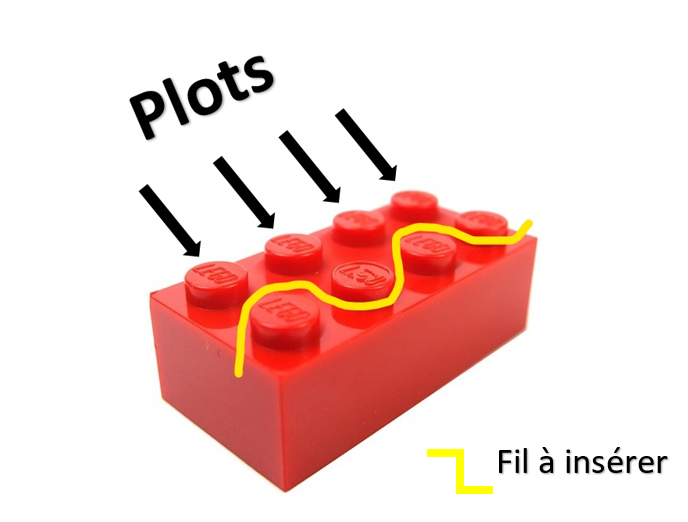
had to gradually dismantle parts of the castle to be able to slide the wires between the bricks so that they were as well hidden as possible. When I say between the bricks, I mean between the studs of the bricks and I assure you that it is quite an art! Be careful not to crush the wires between the bricks. If the wire is pinched, the LEDs may not work.
Once the kit was completely installed, I prayed to the blue star with all my might that the LEDs would work and that I wouldn’t have to take everything apart…
Miracle: everything worked! “When you wish upon a star, your dreams come true.”
After a few more hours of effort, my castle was glowing! I didn’t count exactly how long it took me (I estimate about 6 hours), I mostly took my time and I complained a lot ^^.
For me, it was not that easy to install the kit. Between some clumsiness on my part and other parts not easily accessible to slide the LEDs, I did not take any particular pleasure during the installation. Unlike the construction of the castle which was very instructive and went wonderfully well. But to be honest, when I saw the final result, I thought it was really worth it! Hard work always triumphs over all difficulties 😉
I will let you judge for yourself.
In conclusion
Despite the price, which may be off-putting, I don’t regret my purchase for a moment. As I said earlier, my friends and family often compliment me on this beautiful piece of work. And the addition of LEDs, in my opinion, adds even more magic to the result.
IThere are stands to put it on and just in case, to make it easier to move.
Some people also opt to display it in a showcase, which avoids dusting it too often. I admit that without a display case, dust appears more quickly and here again, you have to be meticulous when cleaning your castle. The display case will also avoid the risk of breakage by some of your tactile and indelicate visitors. We do as we do with children, we tell them to “touch with their eyes”.
I love allthe details, all the little mechanisms to build and all the references in the set: from Beauty and the Beast and Aladdin to Snow White and Cinderella, I was dreaming while I built.
For those who don’t want to make it a showpiece, you can of course combine your construction with other LEGO® figures and sets for endless adventures!

The + of Disney Castle – LEGO® Disney™
- Clear and precise instructions.
- Considerable detailed and educational construction.
- True to the original.
- Very beautiful LEGO® set.
- References to scenes from the great Disney classics.
The – of Disney Castle – LEGO® Disney™
- The price.
- Substantial size.
The + of the lighting kit by Lightailing
- Clear and precise instructions.
- Very good final results.
The – du kit the lighting kit by Lightailing
- Price.
- Slightly complicated installation.